
Krowtann Instructions: A Comprehensive Guide
Krowtann, alongside options like Para Tan and Curatan, is a popular choice for both craft and taxidermy applications. This guide provides a detailed walkthrough,
leveraging resources like the “Ultimate Guide to Skinning and Tanning” and various DIY tutorials available online.
Many users rely on Krowtann kits and consider older, text-based guides invaluable resources. Proper preparation, including careful skinning and fleshing, is crucial for successful results.
What is Krowtann?
Krowtann is a commercially available tanning agent, specifically a tanning formula, widely utilized by both hobbyists and professionals for preserving and transforming animal hides into leather. It’s recognized for its effectiveness and relatively straightforward application, making it a favored choice for those venturing into home tanning projects. Unlike traditional tanning methods that can be complex and time-consuming, Krowtann offers a more accessible pathway to achieving quality results.
The product, often available as Krowtann 2000, is a chemical mixture designed to penetrate the hide’s fibers, preventing decomposition and imparting durability, softness, and flexibility. It differs from other tanning agents like Para Tan or Curatan in its specific chemical composition and application process, often requiring precise mixing ratios and careful monitoring during the tanning phase.
Online resources, including DIY guides and taxidermy tutorials, frequently recommend Krowtann for its reliability. Many experienced tanners even cite older, text-based guides as essential references when working with Krowtann, highlighting its long-standing presence in the tanning community. It’s a versatile option suitable for various hides, from small fur-bearing animals to larger game species.
Understanding Krowtann 2000 vs. Other Tanning Methods
Krowtann 2000 distinguishes itself from other tanning methods through its chemical formulation and ease of use. Traditional methods, like vegetable tanning, involve lengthy processes utilizing natural tannins from bark and plants, demanding significant time and expertise. Conversely, Krowtann 2000 employs a synthetic chemical process, drastically reducing tanning time – often to just a few days – and simplifying the procedure.
Compared to alternatives like Para Tan or Curatan, Krowtann 2000 offers a unique balance between speed and quality. While some methods prioritize rapid tanning, potentially sacrificing leather softness, Krowtann aims for a more comprehensive result. It requires careful adherence to mixing instructions, ensuring proper chemical penetration and preventing hide damage.
The choice of method often depends on the desired outcome and the tanner’s experience. Kits utilizing other chemicals are available, but Krowtann’s established reputation and readily available guidance – including detailed manuals and online tutorials – make it a popular starting point for beginners. Ultimately, Krowtann 2000 provides a convenient and effective pathway to leather preservation.
Essential Supplies for Krowtann Tanning

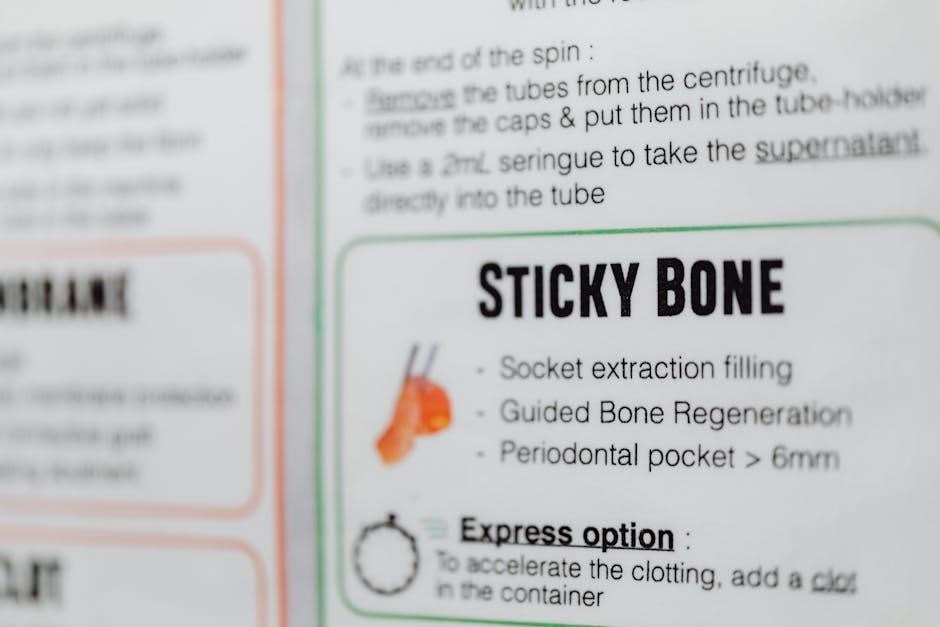
Successfully utilizing Krowtann requires gathering specific supplies. First and foremost is the Krowtann 2000 tanning solution itself, available in various kit sizes depending on the hide volume. A dedicated plastic tub or container – crucial as the chemicals can damage other materials – is needed for the tanning process; Essential tools include a fleshing beam or a sturdy, flat surface for removing excess tissue.
Beyond these core items, a sharp fleshing knife is indispensable for efficient hide preparation. Salt, used for initial preservation, is a necessity. A tumbler, though not strictly required, significantly enhances leather softness and pliability. For neutralizing the hide post-tanning, a pH testing kit and neutralizing agent are vital.
Finally, consider acquiring leather oil to restore natural oils lost during the process, and materials for stretching and shaping the finished leather. Gloves and eye protection are paramount for safety when handling the chemicals. Having these supplies readily available streamlines the Krowtann tanning process, ensuring optimal results.
Skinning the Hide: Preparation is Key
Proper skinning is the foundational step in successful Krowtann tanning. Begin by carefully removing the hide from the animal, aiming for clean cuts to avoid damaging the underlying skin. Pay close attention to areas like the legs, ears, and around the eyes and lips, ensuring a complete and careful removal. This initial stage directly impacts the final leather quality.
Turning the lips, nose, ears, and eyes – a technique often highlighted in instructional guides – is crucial for thorough tanning and prevents future issues. The goal is to create a “case-skinned” hide, meaning it’s removed like a sock, inside-out. Avoid excessive cuts or nicks, as these can weaken the hide and complicate the fleshing process.
Immediately after skinning, the hide should be cooled to prevent bacterial growth. This can involve refrigerating or salting. A well-executed skinning process minimizes the amount of fleshing required later, saving time and effort. Remember, a clean, careful skinning sets the stage for a superior finished product when using Krowtann.
Fleshing the Hide: Removing Excess Tissue
Fleshing is a critical step following skinning, essential for successful Krowtann tanning. This process involves removing all remaining muscle tissue, fat, and membranes from the flesh side of the hide. A sharp fleshing beam and a dedicated fleshing tool are vital for efficiency and to prevent damage to the grain.
Work methodically, applying consistent pressure to avoid cutting or tearing the hide. The goal is a clean, smooth surface, free of any organic material that could interfere with the tanning process. Pay particular attention to areas where tissue is tightly adhered, like around the legs and spine. Thorough fleshing ensures even penetration of the Krowtann solution.
Proper fleshing also aids in softening the leather during the tumbling stage. Leaving tissue behind can lead to rot, hair slip, and a generally inferior final product. While demanding, diligent fleshing is a cornerstone of quality leather production when utilizing Krowtann or similar tanning methods.
Salting the Hide: Preservation Techniques

Immediately after fleshing, salting the hide is paramount for preservation, preventing bacterial growth and decomposition before tanning with Krowtann. Non-iodized salt is crucial; iodized salt can damage the hide. Generously cover the flesh side with a thick layer of salt, ensuring it penetrates all crevices.
A common technique involves rubbing the salt vigorously into the flesh side, working it in until the hide feels cool to the touch. This draws out moisture, creating an unfavorable environment for bacteria. Fold the hide flesh-side to flesh-side and repeat the salting process on the hair side, though with a lighter application.
The amount of salt needed varies with hide size and thickness, but a general guideline is to use enough to thoroughly coat all surfaces. Allow the salted hide to rest for several days, periodically checking and adding more salt as needed. Proper salting is a vital step, ensuring the hide remains in optimal condition for Krowtann processing.
Rehydrating the Hide: Preparing for Tanning
Before applying the Krowtann solution, the salted hide must be thoroughly rehydrated. This process restores the hide’s pliability, allowing the tanning agents to penetrate effectively. Begin by submerging the hide in cool, clean water, ensuring it’s fully saturated.
Allow the hide to soak for several hours, or even overnight, depending on its thickness and the extent of salting. Periodically check the hide, and gently work it with your hands to aid in water absorption. The goal is to return the hide to a state similar to its freshly fleshed condition – soft and supple.
Once rehydrated, the hide will likely be quite heavy. Excess water needs to be removed before tanning. This can be achieved by gently squeezing the hide, or by using a hide roller. Avoid harsh twisting or stretching, which can damage the grain. Proper rehydration is critical for successful Krowtann tanning, ensuring even penetration and a quality finished product.
Mixing the Krowtann Solution: Precise Ratios
Achieving optimal tanning results with Krowtann hinges on accurately mixing the solution. Always refer to the specific instructions included with your Krowtann kit, as ratios can vary slightly between formulations (like Krowtann 2000). Generally, the process involves dissolving the Krowtann powder in warm water.

Start with a plastic container – metal can react with the chemicals. Add the appropriate amount of warm water, then slowly introduce the Krowtann powder while stirring continuously. Avoid creating clumps by adding the powder gradually. Ensure the powder is completely dissolved before proceeding; a clear solution indicates proper mixing.
Temperature is also important; warm water aids dissolution, but avoid excessive heat. Once mixed, the solution is ready for application. Precise adherence to the recommended ratios is crucial for effective tanning and a high-quality leather finish. Deviations can lead to uneven tanning or a compromised final product.
Applying Krowtann to the Hide: Step-by-Step Process
With the Krowtann solution prepared, the next step is thorough application to the prepared hide. Begin by ensuring the rehydrated hide is fully clean and free of any remaining flesh or fat. Submerge the hide completely in the Krowtann solution, ensuring every surface is saturated.
Gentle agitation is key; work the solution into the hide, paying particular attention to areas like the edges and around the lips, nose, ears, and eyes – these areas require extra attention. Consistent movement helps the Krowtann penetrate the fibers effectively.
The hide should remain submerged for the duration specified in your kit’s instructions, typically several hours or overnight. Regular checking and turning of the hide during this period ensures even penetration. Avoid overcrowding the container, allowing sufficient space for the solution to circulate freely around the entire hide.
Working the Hide: Maintaining Flexibility
After the initial Krowtann application, consistent “working” of the hide is vital to prevent it from becoming stiff and brittle. This process involves repeatedly stretching and manipulating the hide, mimicking the natural movement of the animal’s skin. Begin by gently pulling and stretching the hide in all directions, focusing on areas prone to tightening, like the back and legs.
As you work, pay attention to the hide’s texture; it should gradually become more pliable and supple. This process breaks down the fiber structure, enhancing softness and flexibility. Continue working the hide for an extended period, ideally several hours, or even over multiple sessions.
Regularly check for any areas that resist stretching and apply focused effort to those spots. Maintaining consistent moisture during this stage is also crucial; lightly mist the hide with water if it begins to dry out, aiding in its continued pliability.
The Tumbling Process: Softening the Leather
The tumbling process is a critical step in achieving exceptionally soft and supple leather after Krowtann tanning. This involves mechanically agitating the hide, further breaking down the fiber structure and enhancing its overall softness. While professional tumblers are available, smaller-scale operations can utilize repurposed washing machines or even large plastic barrels.
Before tumbling, ensure the hide is thoroughly worked and neutralized. Add softwood shavings – pine or aspen work well – to the tumbler alongside the hide. These shavings act as an abrasive, aiding in the softening process and preventing the leather from sticking together.

Tumble the hide for several hours, periodically checking its progress. The duration depends on the hide’s thickness and the tumbler’s efficiency. Regularly add water to maintain a slightly damp environment. The result should be a dramatically softer, more pliable leather, ready for finishing.
Neutralizing the Hide: Balancing the pH
Following the Krowtann application and working stages, neutralizing the hide is essential for long-term stability and preventing future deterioration. The tanning process alters the hide’s natural pH, making it acidic. Neutralization restores a balanced pH, crucial for optimal leather quality.
Typically, a solution of baking soda (sodium bicarbonate) and water is used for neutralization. The precise concentration depends on the size and thickness of the hide, but a common starting point is one cup of baking soda per gallon of water. Immerse the hide in this solution, ensuring complete saturation.

Monitor the pH using pH strips or a meter. The target pH range is between 5.0 and 6.0. Regularly test and adjust the baking soda concentration as needed. Thorough rinsing with clean water after neutralization is vital to remove any residual baking soda, which could affect subsequent oiling and finishing processes.
Oiling the Leather: Restoring Natural Oils
After neutralizing, the leather feels dry and stiff due to the removal of natural oils during the tanning process. Oiling replenishes these oils, restoring suppleness, flexibility, and preventing cracking; Neat’sfoot oil is a traditional choice, favored for its excellent penetration and conditioning properties, but other options like mink oil or specialized leather oils are also suitable.
Apply the oil liberally to the flesh side of the leather, working it in thoroughly with your hands or a sponge. Ensure even distribution, paying attention to areas prone to dryness, such as edges and corners. Allow the oil to penetrate for several hours, or even overnight, for optimal absorption.
Excess oil should be wiped off with a clean cloth. Multiple light applications are preferable to a single heavy application, preventing a greasy feel. Proper oiling significantly enhances the leather’s durability, water resistance, and overall aesthetic appeal, preparing it for final finishing;
Drying the Leather: Preventing Damage
Drying is a critical stage, as improper techniques can lead to irreversible damage like cracking or shrinking. Avoid direct heat sources like radiators or sunlight, which cause rapid drying and rigidity. The ideal drying environment is cool, dry, and well-ventilated, with a temperature around 60-70°F (15-21°C).
Stretch the leather periodically during the drying process to maintain its shape and prevent shrinkage. This can be done by re-staking it on a stretching frame or simply pulling and manipulating it by hand. Consistent stretching ensures the fibers remain relaxed and pliable.
Lay the leather flat on a non-stick surface, such as plastic sheeting or a drying rack. Avoid using materials that could stain or adhere to the leather. The drying time varies depending on thickness and environmental conditions, typically taking several days. Patience is key to achieving a beautifully dried, supple hide.

Finishing Touches: Stretching and Shaping
Once the leather is thoroughly dried, the final stretching and shaping process refines its texture and form. This stage is vital for achieving the desired softness and pliability, especially after the drying phase which can sometimes induce some stiffness. Consistent manipulation is key.
Re-staking the leather – working it repeatedly with a dull tool or by hand – breaks down any remaining fibers and enhances its suppleness. Stretching frames are incredibly useful here, allowing you to apply even tension across the entire hide. Focus on areas prone to shrinkage.
Consider the intended use of the leather when shaping it. For garments, stretch it to the desired dimensions. For crafts, mold it around forms to create specific shapes. This final attention to detail elevates the leather from a tanned hide to a finished, usable material, ready for your projects.
Troubleshooting Common Krowtann Issues
Krowtann tanning, while effective, can present challenges. Uneven tanning often stems from insufficient agitation during the process or inconsistent solution concentration. Ensure thorough mixing and regular turning of the hide. Hair slip, where hair detaches, can indicate overly aggressive fleshing or improper pH levels.
If the leather feels brittle after drying, insufficient oiling is likely the culprit. Re-oil the hide with a quality leather oil, allowing it to fully absorb. Conversely, excessively oily leather may require a light dusting of talc to absorb excess oil before final finishing.
Mold growth, though rare with proper salting and drying, can occur in humid environments. Treat affected areas with a leather-safe fungicide. Remember, meticulous preparation and adherence to the Krowtann instructions are the best preventative measures. Consulting online forums and experienced tanners can also provide valuable solutions.
Resources and Further Learning

Expanding your knowledge beyond this guide is crucial for mastering Krowtann tanning. Numerous online resources offer valuable insights and support. The Wild Pursuit’s channel features a comprehensive DIY guide to soft tanning fox and raccoon hides, providing visual learning opportunities.
For in-depth understanding, consider exploring the “Ultimate Guide to Skinning and Tanning,” a complete resource for working with pelts. Online taxidermy communities and forums are excellent platforms to connect with experienced tanners, share experiences, and troubleshoot issues.
Don’t underestimate the value of older, text-based guides – many seasoned tanners consider them essential references. Manufacturers like Krowtann often provide detailed manuals and support materials. Continuously learning and experimenting will refine your technique and yield exceptional results. Remember to always prioritize safety and responsible sourcing of hides.