
Assembling a futon requires careful preparation and the right tools. With a Phillips Head Screwdriver and organized components‚ you can efficiently complete the process. It’s a manageable DIY project that ensures comfort and functionality‚ perfect for enhancing your living space with proper assembly techniques.
1.1 Importance of Following Instructions
Following the assembly instructions ensures a safe and efficient process. It prevents damage to components‚ avoids common mistakes‚ and guarantees stability. By adhering to the guide‚ you verify all parts are included and correctly positioned. This step-by-step approach minimizes errors and ensures your futon functions as intended‚ providing long-term comfort and durability while maintaining safety standards.
1.2 Overview of Tools and Materials Needed
To assemble your futon‚ essential tools include a Phillips Head Screwdriver‚ Flat Head Screwdriver‚ and Allen Key. Materials like wooden frames‚ bolts‚ screws‚ and dowels are typically provided. Ensure all hardware is sorted and counted before starting. Protect your workspace with cardboard or carpet to prevent damage. Having these tools and materials ready ensures a smooth assembly process.

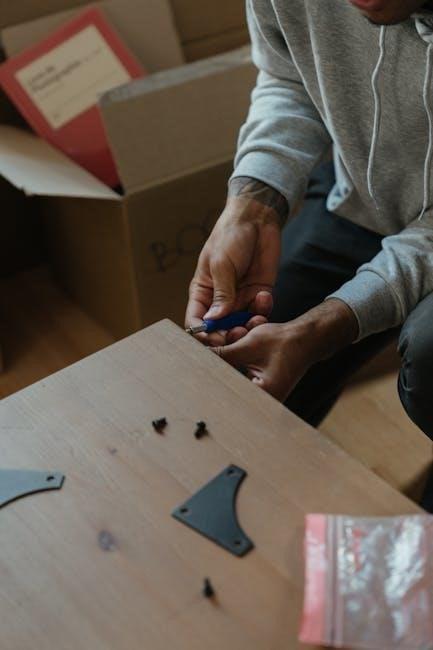
Pre-Assembly Preparation
Unpack all components and organize them on a protected surface. Use cardboard or carpet to prevent damage. Ensure all parts are accounted for before starting assembly.
2.1 Unpacking and Organizing Components
Begin by carefully unpacking the futon components from their boxes. Place wooden pieces on a non-abrasive surface like carpet or cardboard to protect the finish. Hardware should be sorted and organized by size for easy access. This step ensures all parts are accounted for and prevents damage‚ making assembly smoother and more efficient.
2.2 Protecting the Workspace and Components
Protecting your workspace and components is crucial during assembly. Cover the floor with cardboard‚ paper‚ or carpet to prevent scratches. Lay wooden pieces on a soft surface to avoid damage. Ensure the area is clear of debris and obstacles. This precautionary step ensures the futon remains in pristine condition and prevents potential damage during the assembly process.
Step-by-Step Assembly Process
Begin by unpacking and identifying all components. Attach armrests and cross rails using the provided hardware. Ensure proper alignment and secure connections for stability and durability.
3.1 Attaching Armrests and Cross Rails
Start by aligning the armrests with the pre-drilled holes on the futon frame. Insert the cross rails between the armrests‚ ensuring they fit securely. Use a Phillips Head Screwdriver to tighten the bolts‚ making sure the connections are firm. Proper alignment is crucial for stability. Double-check the hardware to ensure all parts are tightly fastened before proceeding to the next step.
3.2 Installing Support Legs and Backrest
Mount the support legs to the frame using the provided Allen Key. Position the backrest and align its brackets with the frame’s slots. Secure it with bolts‚ tightening firmly. Ensure the backrest is level and the legs are stable. This step ensures the futon’s structural integrity and prepares it for converting into a bed. Proper installation here is key to safety and functionality.
3.3 Securing the Seat Deck and Hardware
Align the seat deck with the frame‚ ensuring proper fitment. Use clevis pins to secure it firmly. Tighten all bolts and screws to maintain stability. Double-check connections for safety. Properly securing the seat deck ensures the futon’s durability and functionality‚ preventing any structural issues during use or conversion into a bed. This step is crucial for long-term stability and user safety.

Converting the Futon into a Bed
Slide the back and seat deck forward‚ ensuring the frame locks into place. Pull the seat deck toward you to lay it flat‚ securing it with locking mechanisms for stability.
4.1 Adjusting the Frame for Bed Position
To convert the futon into a bed‚ slide the backrest forward and pull the seat deck toward you; Align the frame components securely‚ ensuring clevis pins engage properly. Lock the mechanisms to stabilize the bed position. Verify the frame is flat and stable before use. This ensures safety and comfort when transitioning from sofa to bed mode.
4.2 Locking Mechanisms and Safety Features
Engage the locking mechanisms to secure the frame in bed position‚ ensuring stability and preventing accidental movement. Clevis pins and stop blocks are essential for maintaining structural integrity. Regularly check bolts and screws to tighten as needed‚ ensuring long-term safety. Always follow manufacturer guidelines to avoid damage and ensure the futon remains secure and stable during use.

Regular Maintenance and Care
Regular maintenance ensures longevity. Tighten bolts and screws periodically to maintain stability. Clean the finish with appropriate products to protect the material and preserve appearance.
5.1 Tightening Bolts and Screws
Regularly tightening bolts and screws is crucial for maintaining the futon’s stability and preventing damage. Use an Allen key or screwdriver to ensure all connections are secure. Check armrests‚ cross rails‚ and support legs every 1-2 months. This simple maintenance step prevents wobbling and ensures long-term durability. Always refer to the manual for specific tightening sequences and torque recommendations.
5.2 Cleaning and Protecting the Finish
Cleaning and protecting the finish preserves the futon’s appearance and longevity. Use a soft cloth with mild furniture polish to wipe down surfaces. Avoid harsh chemicals or abrasive materials that may damage the finish. Regular cleaning prevents dust buildup and maintains the wood’s natural luster. For fabric parts‚ vacuum gently and spot clean spills immediately to prevent stains and extend durability.

Troubleshooting Common Issues
Common assembly issues include missing parts‚ loose joints‚ or misaligned pieces. Verify all components are present and securely fastened. Adjust any misaligned parts carefully to ensure stability and proper function.
6.1 Identifying and Resolving Assembly Problems
Identify assembly issues by checking for loose screws‚ misaligned parts‚ or missing hardware. Verify each step in the instructions to ensure accuracy. For misaligned pieces‚ gently adjust them without force. If a part is missing‚ consult the manual or contact customer support. Regularly tighten bolts to prevent instability and ensure the futon remains sturdy and functional over time.
6.2 Addressing Wobbly or Unstable Frames
A wobbly frame often results from loose connections or uneven surfaces. Tighten all bolts and screws firmly‚ ensuring each joint is secure. Check for level placement and adjust as needed. If instability persists‚ inspect for damaged parts or missing hardware. Reassemble any components that were improperly fitted‚ following the instructions carefully to restore stability and safety to the futon frame.
Safety Tips and Precautions
Always wear protective gloves and eyewear during assembly. Ensure the workspace is clear of obstacles to prevent accidents. Use a second person for heavy parts to avoid strain and ensure stability‚ keeping children and pets away from the assembly area for their safety and yours. Follow all manufacturer guidelines to ensure a secure and stable structure‚ avoiding potential hazards and injuries. Regularly inspect the futon frame for any signs of wear or damage‚ addressing them promptly to maintain safety and durability. Avoid overloading the futon beyond its recommended weight capacity to prevent collapse. Keep sharp tools out of reach of children and ensure all bolts and screws are tightened properly to avoid any loose parts that could cause instability. By adhering to these precautions‚ you can safely assemble and enjoy your futon for years to come.
7.1 Avoiding Damage to the Futon and Surroundings
Protect your futon and workspace by covering the floor with cardboard or carpet to prevent scratches. Handle all components gently‚ avoiding drops or impacts. Use non-abrasive surfaces for placing wooden parts. Ensure tools are used correctly to avoid stripping screws or damaging hardware. Regularly inspect for loose parts and tighten them promptly. Keep the assembly area clean and organized to prevent accidental damage to the futon or surrounding items.
7.2 Preventing Accidents During Assembly
Ensure a clear workspace to avoid tripping hazards. Use tools correctly to prevent slipping or over-tightening‚ which could damage components. Keep children and pets away to avoid accidental knocks or interruptions. Always follow instructions to ensure stability and proper alignment. Regularly check for loose parts and test the futon’s stability before use. This ensures a safe and secure assembly process for everyone involved.

Additional Resources
Access downloadable futon assembly guides (PDF) and video tutorials for comprehensive instructions. Visit www.kodiakfurniture.com for detailed resources and support.
8.1 Downloadable Futon Assembly Guides (PDF)
Downloadable futon assembly guides (PDF) provide detailed‚ step-by-step instructions with diagrams. Available on manufacturer websites like Kodiak Furniture‚ these guides ensure accurate assembly. They include tool requirements‚ part identification‚ and safety tips‚ making the process smooth and efficient for all users. Access these resources to avoid assembly errors and ensure proper installation of your futon frame.
8.2 Video Tutorials for Visual Learners
Video tutorials offer a visual guide for assembling futons‚ complementing PDF instructions. Platforms like YouTube feature step-by-step demonstrations‚ showing how to attach armrests‚ install support legs‚ and secure seat decks. These videos are ideal for visual learners‚ providing real-time guidance and helping to troubleshoot common assembly challenges effectively.

Adjusting Futon Positions
Futons can be adjusted to upright‚ leaning back‚ or flat positions for versatility. Converting between settings is straightforward‚ ensuring comfort and stability in every configuration for optimal use.
9.1 Upright‚ Leaning Back‚ and Flat Positions
Futons offer versatile positioning options‚ including upright‚ leaning back‚ and flat configurations. For upright‚ ensure the backrest is fully vertical. Leaning back involves adjusting the angle for relaxation. The flat position converts the futon into a bed‚ achieved by lowering the backrest and securing the frame for stability. Proper adjustment ensures comfort and functionality in each setting‚ providing optimal support and versatility for various needs and preferences‚ making it ideal for both seating and sleeping arrangements with ease of use and durability in mind.
9.2 Customizing Comfort and Support
Customizing your futon’s comfort involves adjusting the backrest and seat deck to your preferred angle. Use clevis pins or locking mechanisms to secure the frame in desired positions. Ensure indentations on end caps face correctly to lock the seat in place. Regularly check and tighten bolts for stability‚ enhancing both comfort and safety. This customization ensures optimal support‚ tailored to individual preferences‚ and prevents potential damage or instability over time‚ providing a durable and enjoyable experience for years to come with proper maintenance and care.

Final Assembly Check
After assembly‚ inspect all parts for tightness and alignment. Check for loose bolts‚ test stability‚ and ensure smooth operation. A sturdy frame ensures safety and durability.
10.1 Verifying All Parts Are Secure
Begin by double-checking each component‚ ensuring all bolts and screws are tightly fastened. Verify that cross rails‚ armrests‚ and support legs are securely attached. Make sure no hardware is missing and that all connections are stable. Properly tightened parts prevent instability and enhance the futon’s durability. Regular checks will ensure long-term functionality.
10.2 Testing the Futon for Stability
After assembly‚ test the futon’s stability by gently pressing down on the seat and backrest. Ensure there’s no wobbling or movement in the frame. Check all joints and connections for firmness. A stable futon provides reliable support and prevents accidents. Testing ensures the structure is safe and durable for daily use‚ guaranteeing comfort and reliability over time.
Thank you for following the guide! Proper assembly ensures durability and comfort. Regular maintenance and careful use will extend your futon’s lifespan. Happy assembling!
11.1 Tips for Long-Term Use and Durability
For long-term use‚ regularly tighten bolts and screws to maintain stability. Avoid overloading the futon and keep it away from direct sunlight to prevent fabric fading. Rotate the mattress periodically to ensure even wear. Clean spills immediately and use protective covers to safeguard the upholstery. These simple care steps will extend the lifespan of your futon.
11.2 Encouragement to Follow Manufacturer Guidelines
Adhering to manufacturer guidelines ensures safety and durability. Proper assembly techniques prevent structural issues‚ while recommended maintenance routines maintain comfort. Following these instructions helps preserve the warranty and enhances longevity. Always refer to the provided manual for specific care and assembly tips tailored to your futon model for optimal performance and satisfaction.